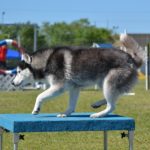
Dog agility seesaws, known as teeter totters, are a standard obstacle you will find in dog agility.
You can easily find seesaws approved for competitions with the American Kennel Club, but they can get super expensive and making your own is budget friendly.

In this article, I will provide you with a step-by-step guide on how to build a dog agility teeter totter.
Let’s get started.
Building An Adjustable Dog Agility Seesaw
Building The Stands
Step one
To begin, you will need to use a handsaw to cut a piece of wood that is 2 by 4 length to be 40 inches in length to create the base. Following this, you will need to cut a piece of wood that is 28 inches for the upright.
Always make sure that you’re using a measuring tape to ensure the measurements are exact.
Step two
Place the 40 inch piece of wood to sit on the 2 inch wide face. Measure a point that is 20 inches (or exactly in the middle) and make a mark with a pencil.
Place the other piece of wood perpendicular to the base, placing it in front of the mark you made. The pieces of wood should look like an upside down T at this point.
Step three
Next, it’s time to apply wood glue to stick the upright to the base. Pull the upright away from the base and apply a thin layer of wood glue. Press the pieces of wood back together, making sure that they are firmly stuck and flush with the ground.
Step four
Although the glue will work to stick the pieces of wood together, you will need to make sure it is secure by screwing the pieces together. Use an electric drill to screw at 23 inch wood screws through the upright and into the base of the stand.
To ensure that they are spaced perfectly, place the screws 1 inch from the edges of the wood in opposite corners.
Step five
Next, you will need to measure and mark two 30 inch lengths of 2 by 4 inches and cut them to size with a handsaw to make the supports. Once you have measured and cut one piece of wood to size, you can use it as a guide for the other.
Step six
Once you have cut these two pieces of wood, use a protractor to measure and mark a 45-degree angle at each end of the supports. Use your handsaw to cut, starting at the bottom corner of the wood and ending 4 inches along the top edge.
Step seven
Glue the supports so that they are sitting flush against the side of the upright.Use more screws to safely secure the bottom of the support to the base, before drilling a screw through the side of the support into the upright.
Step eight
For a sturdy base, you need two identical stands. Repeat this process until you are left with two stands that are exactly the same.
Connect The Stands
Step one
To connect the stands, measure out and mark two 17 inch lengths of 2 by 4 inches. Cut the pieces to size with a handsaw.
Step two
Place the two pieces of wood that you’ve just cut on each side of one upright. You will need to ensure that the two pieces of wood are sitting flush against the side of the base and the bottom of the stand.
Step three
As you did with the other steps, you will need to glue and screw the pieces of wood into the uprights to secure them. Apply the glue and place the pieces of wood back into place before you drill screws through the pieces.
Step four
Move the other stand so that the upright is parallel with the upright on the other stand. Move the second stand into place, so that it matches the first stand.
Repeat the gluing and screwing process to secure it into place.
Attach The Seesaw
Step one
You will need to find a plank of wood that is going to be your seesaw. Typically speaking, the wood for a dog agility seesaw is 12 feet in length. You can purchase a long 2 by 12 inch plank of wood from a hardware store, or alternatively cut it to size with your handsaw.
That being said, you’ll need to be aware that some wood can crack towards the end.
Step two
Following this, mark a line 2 inches from the center of the plank. One end will always need to be lower than the other. With a measuring tape, find the center of the plank and make a mark with a pencil to mark the fulcrum.
Step three
Next, you will need to place a ¾ inch pipe straps along the line you have just marked. Screw the first pipe strap into place in the center of the plank and add two more either side of it, roughly 4 inches away from the center strap.
Step four
Mark four points on each upright so that you are able to adjust the height of your seesaw.
While the standard heights for an agility seesaw are 8, 12, 18, and 24 inches, adjusting the seesaw to lower heights can help build your dog’s confidence in agility.
Step five
Drill 1 inch holes through the center of each mark you’ve made along both uprights.
Step six
Once you’ve drilled these holes, thread a ½ inch galvanized pipe through the pipe straps. It’s important that the pipe is galvanized, as other pipes might not be strong enough to hold the weight of your dog and the plank.
Once the pipe is secure and in place, you will have a fully functional agility seesaw.
Paint The Dog Agility Seesaw
Step one
When it comes to painting your seesaw, you will need to mark the contact areas on each side of the seesaw plank.
This is the space that at each end of the seesaw that the dog must make contact with for the obstacle to be completed. However, the size of this space varies between dog agility associations.
Step two
Paint each of the contact areas that you’ve marked with an even application of paint. Make sure that you opt for a paint that is suitable for outdoor use, such as a latex or oil-based paint that won’t wash away.
Step three
Cover the unpainted area with a contrasting color so your dog knows exactly where to land.
Step four
Allow the paint to dry for a minimum of 3 to 4 hours in the sun, or check the manufacturer’s instructions on how long to leave it for.
Step five
Once dry, add another layer of paint to ensure the colors stand out.
Step six
Next, you will want to add an even layer of sand to the wet paint. This will prevent the plank from becoming wet and slippery, even when it rains.
Step seven
Wipe away any excess sand once the paint has been allowed to dry. You can even add another layer after this to cover some of the sand.
- 8 Signs That Your Dog Is In Heat - November 8, 2022
- Why Is My Dog Whining Whilst Carrying A Toy In Their Mouth? - August 17, 2022
- Reasons Why Your Dog’s Poop Is White And What To Do About It - August 17, 2022


